Vendors
Keep the companies you buy from, with their contacts, rates and compliance documents, so an order or an expense picks them in one click.
In this article
Before you start
- The vendor trade licence and VAT TRN, if you have them.
Find a vendor
Open Vendors. The subtitle 1 counts your vendors, the preferred ones and the ones that require review.
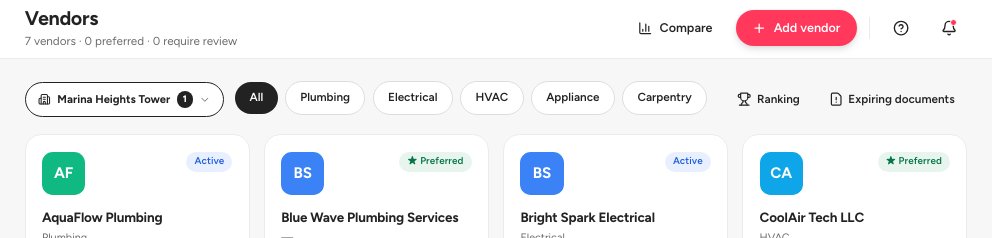
- Summary of your vendors
- Filter by category
- Add vendor
Use the category pills 2 to narrow the cards. Ranking and Expiring documents are on the same row. Compare puts vendors side by side.
Add a vendor
Click Add vendor 3.
Under Company, enter the Trade name 1, the Trade license # 2 and the VAT TRN 3. Tick the Categories and Service area that apply.
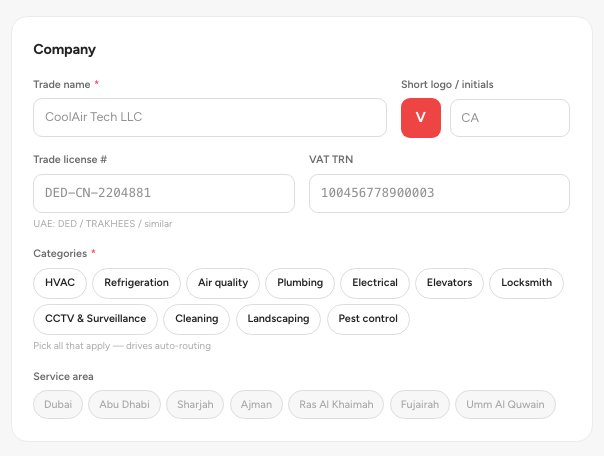
- Trade name
- Trade license #
- VAT TRN
Under Primary contact, enter the Full name, Email and Phone. Dispatch email is a separate address for documents you send to the vendor.
Under Pricing & SLAs, enter the Hourly rate 1, the Callout fee, the Approval cap, and the response and resolution times 2. Choose the Payment terms.
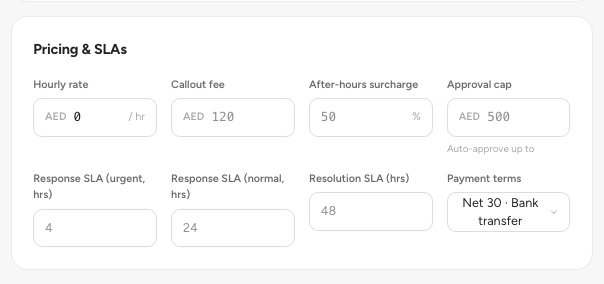
- Hourly rate
- Response and resolution SLAs
Add the Compliance documents, set the vendor Status, and save.
Important — A vendor's IBAN is write-only. After you save it, the screen shows only a masked copy.
What this does to stock and the ledger
Adding or editing a vendor changes no stock and posts nothing. What you buy from the vendor does: a posted vendor bill or a recorded expense credits 2101 Vendor Payables, and paying it clears it. See Purchase orders and Record an expense.
Where it sits in the chain
The vendor is the start of the buying chain: Vendor, then Purchase order or Expense, then the vendor bill, then Payment. An order or an expense offers only vendors that are Active.
FAQ
A vendor's licence is about to expire.
Open Expiring documents to see every document that is near its date, and upload the new one.
Can I stop using a vendor?
Yes. Set its Status to inactive. Its orders and bills keep their history.
Related guides
Was this helpful?