Onboard a new tenant
Turn an accepted quote into a tenant, a lease, rent invoices and cheques in five steps.
In this article
Getting started
Open the accepted quote and click Convert to contract. The Onboard tenant wizard opens with the quote’s details already filled in. Nothing is created until you submit the last step: no tenant, no lease, no invoices. You can leave at any time; the page shows when the draft was last saved.
Before you start
- The prospect has an Accepted quote in Property › Leasing › Leads & quotes.
- You have the tenant’s Emirates ID, passport and the cheques they are handing over.
Steps
Step 1, Personal. Verified identity 1 shows the details read from the Emirates ID and cannot be edited here. Under Contact details 2, check the tenant’s email, the UAE mobile number, the preferred language and how they want to be contacted. The emergency contact is optional. Click Continue to lease info 3.
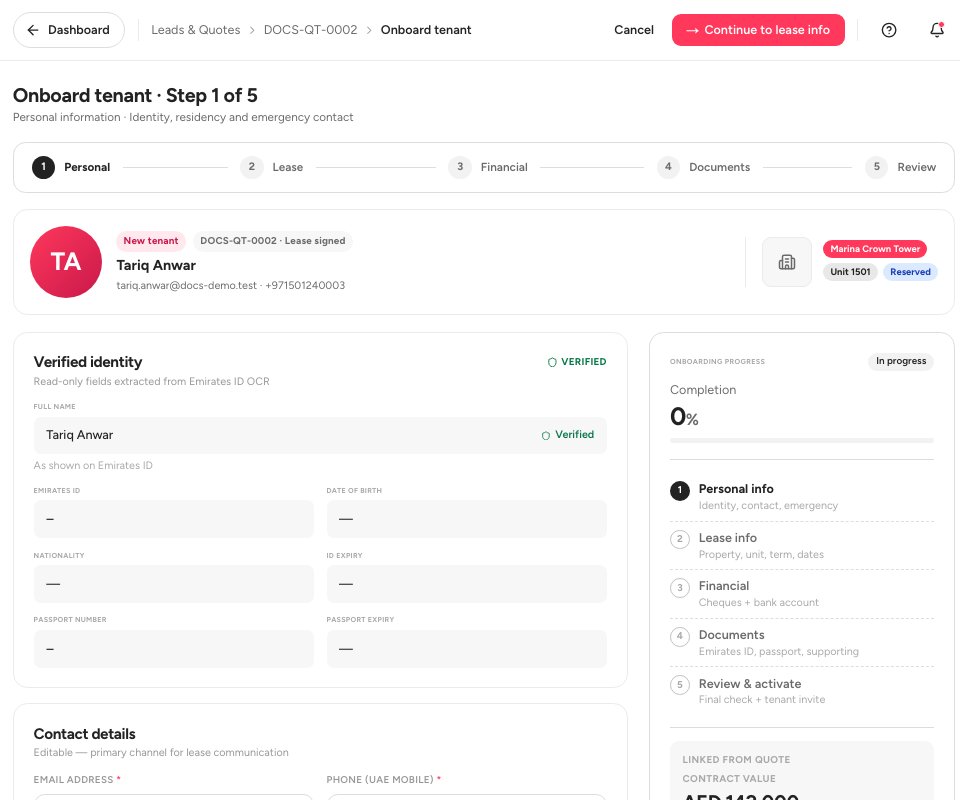
- Verified identity
- Contact details
- Continue to lease info
Step 2, Lease. Check the Property & unit 1 that the quote reserved, then set the Lease start date and Lease end date under Lease term 2. Ultra BMS works out the duration and the lease timeline: the move-in, the 90-day check, the renewal window and the end of the lease. The figures below come from the quote and cannot be edited here. Click Continue to financials 3.
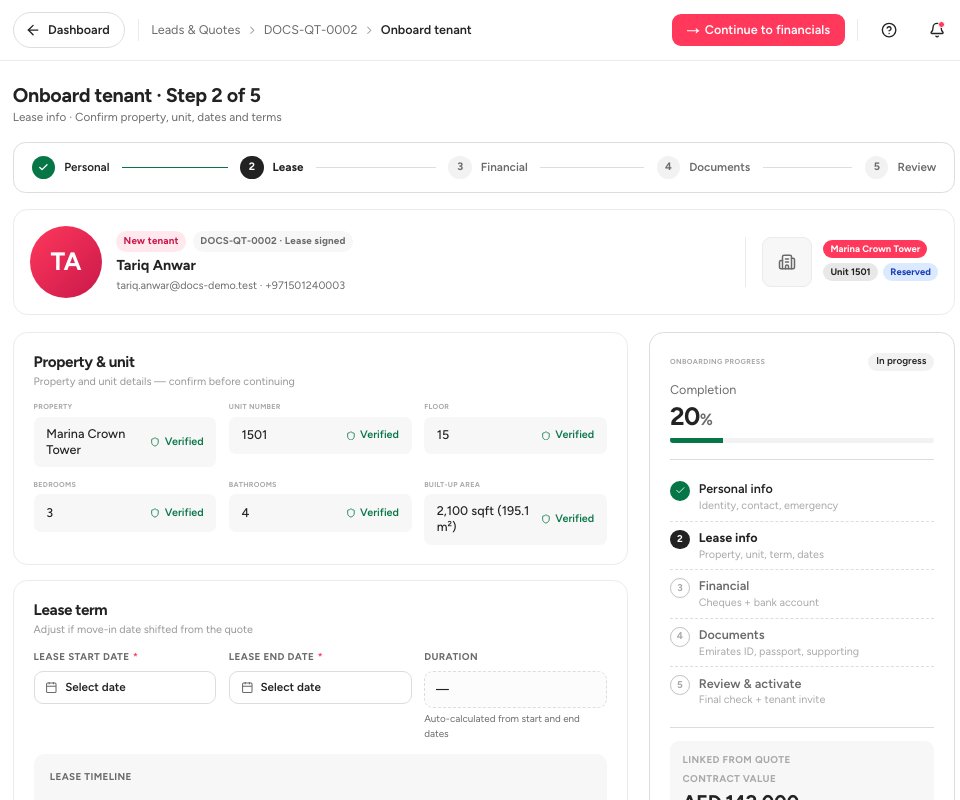
- Property and unit
- Lease term
- Continue to financials
Step 3, Financial. Bank account on file 1 is the account the cleared cheques are paid into. Breakdown from quotation 2 lists the rent, the deposit and the fees, and the payment schedule below it mirrors the quote. Then upload the cheques in Cheque OCR: see the guide on post-dated cheques. Click Continue to documents 3 once every cheque is captured.
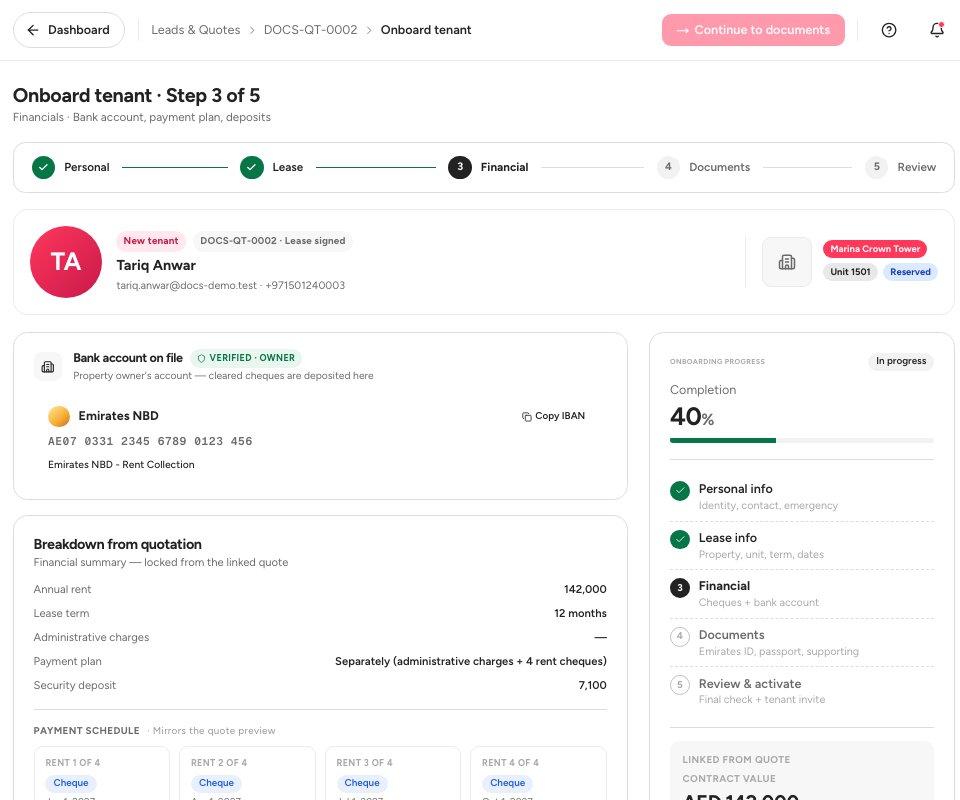
- Bank account on file
- Breakdown from quotation
- Continue to documents
Step 4, Documents. Upload the Emirates ID (Upload Front 1 and Upload Back) and the Passport copy 2: both are required. The visa, the employment letter, the Mulkiya for parking and other documents are recommended. Files can be PDF, PNG or JPG, up to 10 MB each. Click Continue to review 3.
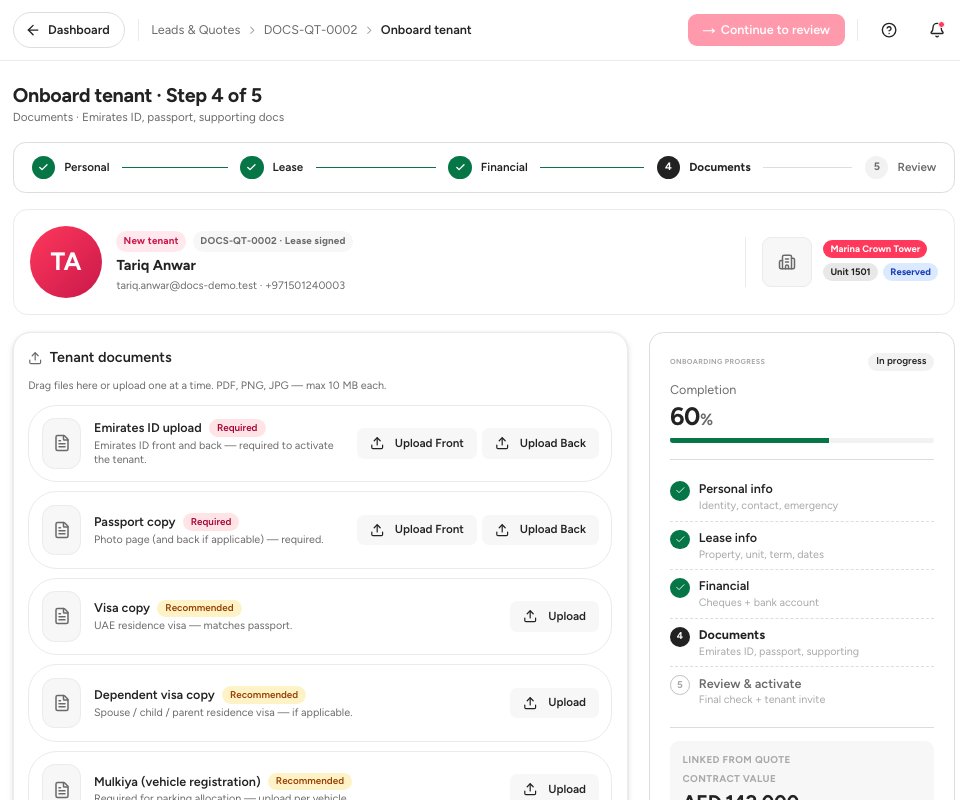
- Upload the Emirates ID
- Passport copy
- Continue to review
Step 5, Review. Read each section; Edit 2 takes you back to its step. Compliance checks 1 lists what must be true before you can activate the tenant: the identity document is uploaded, the required documents are present and the cheques agree with the quote. The other checks (signed lease, Ejari, AML screening) are reminders that you track outside Ultra BMS. Click Submit onboarding 3.
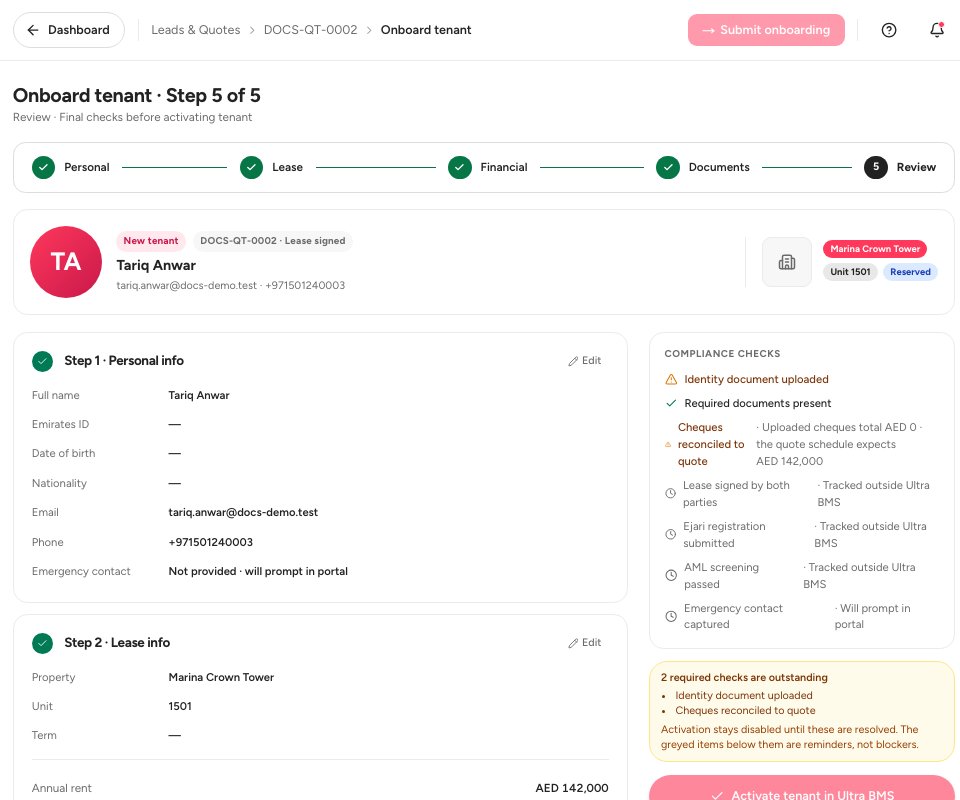
- Compliance checks
- Edit a step
- Submit onboarding
Important — Submitting creates the tenant, the lease, the rent invoices and the cheques in one go, and writes an entry in the audit log that cannot be undone. Check the review before you submit.
Documents
FAQ
Can I change the rent or the cheque dates in the wizard?
No. The financial figures come from the quote and are locked. To change them, update the quote and start again. If a cheque’s date was captured wrongly, you can correct it later on the cheque page while the cheque is still Received or Due.
What happens to the unit?
It shows Reserved while you onboard and Occupied once the lease is active.
Where do I see the new tenant afterwards?
In Property › Leasing › Contracts. See the guide on leases and renewals.
Related guides
Was this helpful?