Invite your team and give them roles
Add the people who will use the workspace, choose what each of them may do, and keep an eye on your 20 seats.
In this article
Before you start
- You hold a role that can manage users, such as Admin.
Add a user
Open Admin in the left rail and choose Access (IAM). The seats line 1 shows how many of your 20 seats are used.
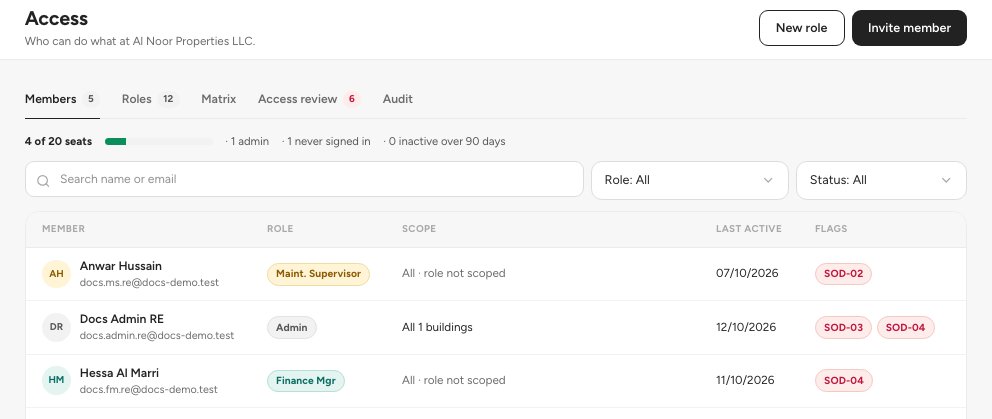
- Seats used
- Members, Roles, Matrix, Access review and Audit tabs
- Invite member
The Members, Roles, Matrix, Access review and Audit tabs 2 sit under the title. Stay on Members.
Click Invite member 3 at the top right.
Step 1, Identity & Info: upload the front of the person's Emirates ID 1. The details are read from it and you can correct them.
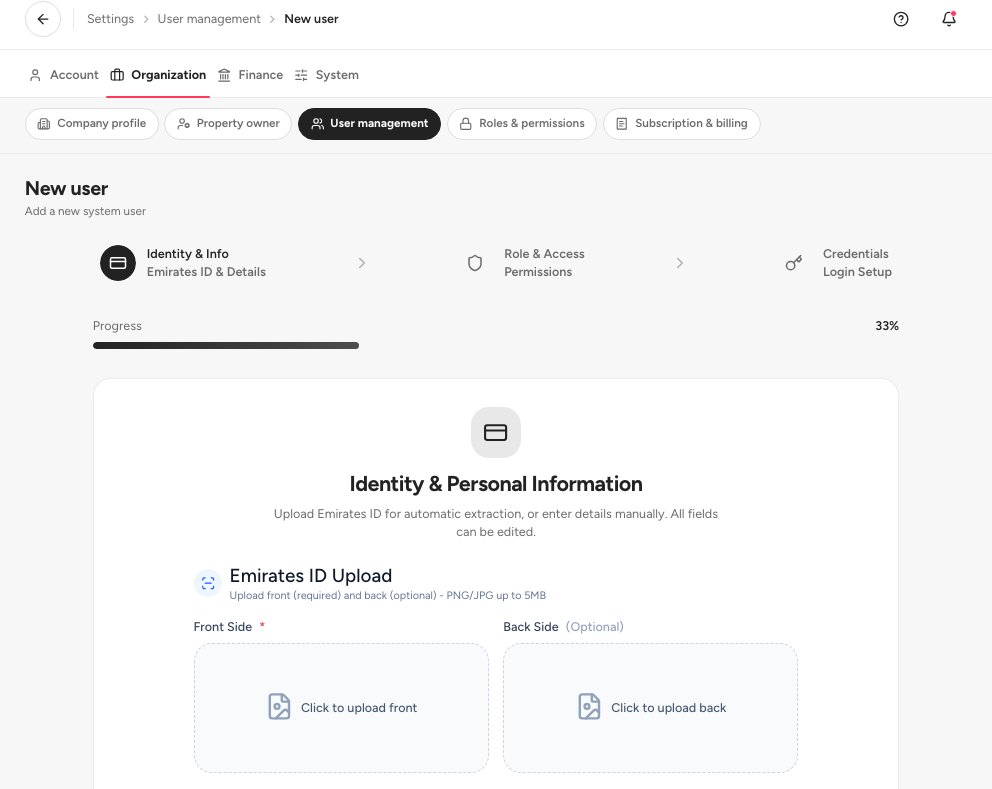
- Upload the Emirates ID front
Step 2, Role & Access: pick the role, and say whether the person needs to sign in.
Step 3, Credentials: confirm the work email. The app emails the person a link to set a password.
Important — Every plan includes up to 20 users. Active and invited staff count toward the 20; deactivated users and portal logins do not. If every seat is taken, creating or reactivating a user is refused and the screen explains why.
Roles
A role is a named set of permissions. Built-in roles are shared by every organisation and cannot be edited. To customise access, create a role from a built-in one and change the copy.
Open Admin › Access (IAM) and choose the Roles tab 1.
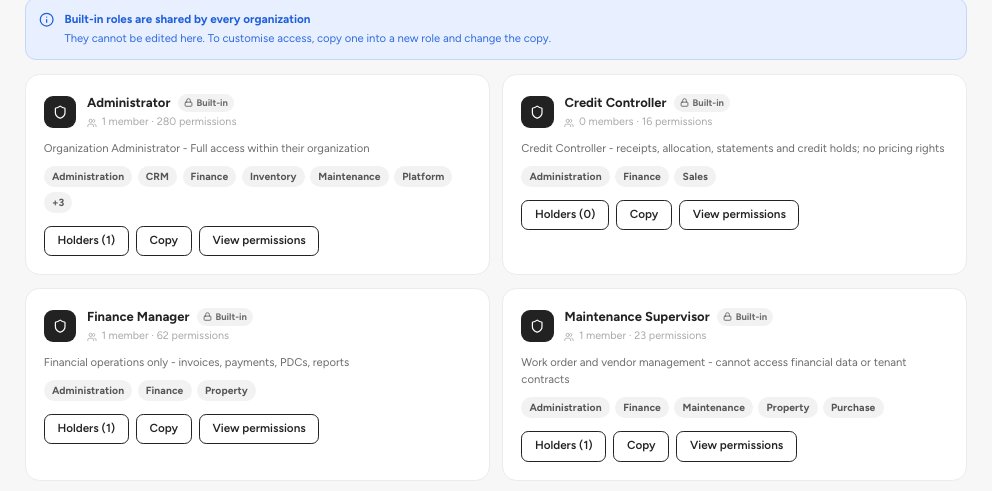
- A role card: members and permission count
- The Built-in badge marks a built-in role
- Built-in roles are shared and cannot be edited
Each card shows how many members hold the role and how many permissions it has. The Built-in badge 2 marks a role every organization shares. The note at the top 3 says built-in roles cannot be edited.
To make your own role, click New role at the top right, or Copy on a built-in role. Step 1 names it and picks the role to start from, step 2 sets what it can do in each module, and step 3 reviews the result before Create role.
User statuses
FAQ
Can I go past 20 users?
Talk to us. The Subscription & billing screen shows your plan and our contact details.
Someone left the company. What do I do?
Open their row and deactivate them. They can no longer sign in, their history stays, and the seat is free again.
Related guides
Was this helpful?